
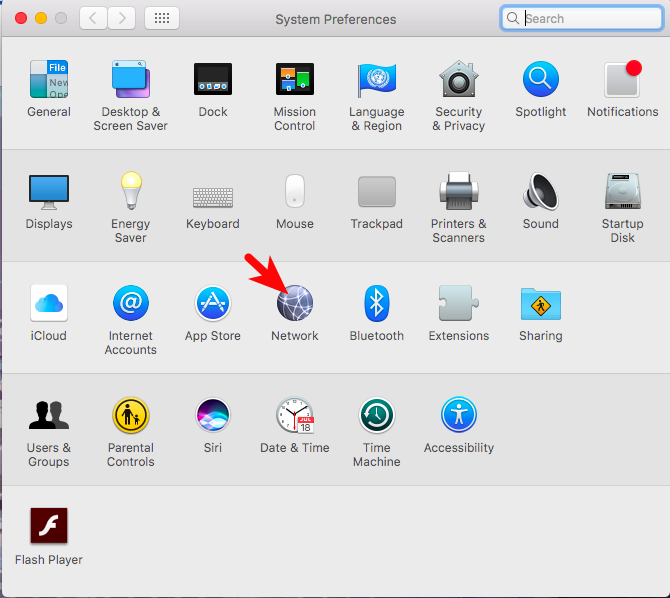
Follow these steps to create a L2TP VPN connection on Mac OSX Sierra:
- Start “Preferences” and click “Network”
2. Click the “+” button at the bottom left to add a new connection and
- choose “VPN” from the “Interface” list
- choose “L2TP over IPSec” from the “VPN Type” list
- type in a descriptive name for the connection (such as: “Bilkent L2TP VPN”)

3. Make sure that the “Configuration” is set to “Default”.
Type “l2tp.bilkent.edu.tr” into the “Server address” box. Please note that the name of the server starts with lowercase “L”; not the digit “1”
Type your VPN account name into the “Account name” box. This account name is the name of the account that you should have created yourself at the address: http://vpnregister.bilkent.edu.tr .
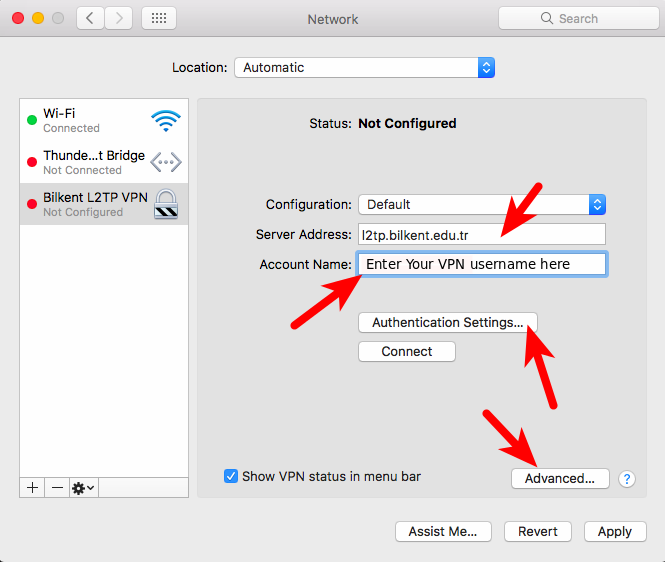
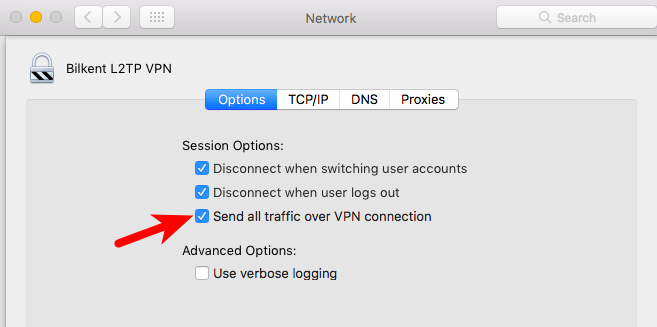
4. Click the “Advanced” button and make sure that “Send all traffic over VPN connection” option is enabled.
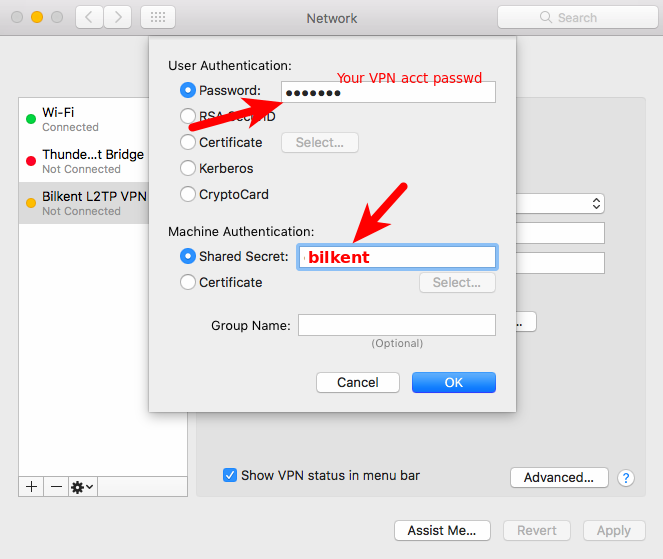
5. Click the “Authentication” button and make sure that “User Authenticaion” method “Password” is enabled and your VPN account password is in the box next to it.
Please also make sure that “Machine Authentication” method “Shared Secret” is anabled and it is set to to the word “bilkent” (lowercase and without the quotes).
6. Click “Apply” and “OK” buttons all the way to the start screen and finally click the “Connect” button to establish a VPN connection.
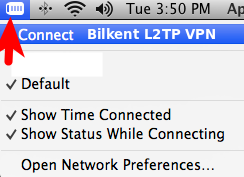
7. Once you create this connection, you should always see a VPN icon at the top. You can use this button whenever you want to establish a VPN connection.
To test whether a VPN connection has been established correctly, user your web browser to visit http://whatismyip.com . You should see a Bilkent network IP address which starts with 139.179 (e.g. 139.179.111.34) as your computer’s IP address.