I needed a simple, easy-to-use signage for a higher education institute. Existing signage software (open source or else) and online services I came across were all either pretty complicated to use or non-free.
I figured I could build one myself using WordPress and a few free plugins and running this on a Raspberry Pi-3 Model B+. Since RPi has an HDMI output, any TV would be suitable as the signage display. This way, the people who are supposed to maintain the signage will no longer need to be experienced IT people. A little WordPress knowledge will be sufficient.
What it looks like?
Parts List
-
-
- A Rasberry Pi 3 Model B+ (“Rpi” in short) + a good power adapter.
- A 32GB SD card ( RPi will use this as the hard disk)
- A Raspbian Desktop Linux image
- HDMI cable
- An LCD TV set to hang on the wall
- A running WordPress installation (on the RPi)
-
Preliminaries
I started by installing Raspbian (a special Debian flavor, tailored for RPi). I downloaded the desktop image from the Raspbian site and burned onto a SD using the dd command on my desktop Linux machine:
dd if=desktop.raspbian.img of=/dev/sdk bs=10000000
Then I installed a few Linux packages that I like and will use to run the RPi as a signage:
ntp: network time protocol
fail2ban: security related
apache2: web server
php, libapache2-mod-php, mysql-server, php-mysql, php-gd, php-xml
Just like all contemporary Debians, Raspbian comes with mariadb as a replacement of mysql database software. All mysql commands work just the same, though…
Then I installed WordPress on the RPi just like the way I would on any Linux distro. You might want to use your favorite search engine for help/tutorials on how to install WP on Debian Linux.
The Plugins I Used
Redirect URL to Post: This plugin by Chatty Mango is the backbone of my signage WP. This plugin can redirect to a randomly selected post when the URL contains the parameter “?redirect_to=random”. The plugin is capable of doing a lot more, but this is the function that was useful for me.
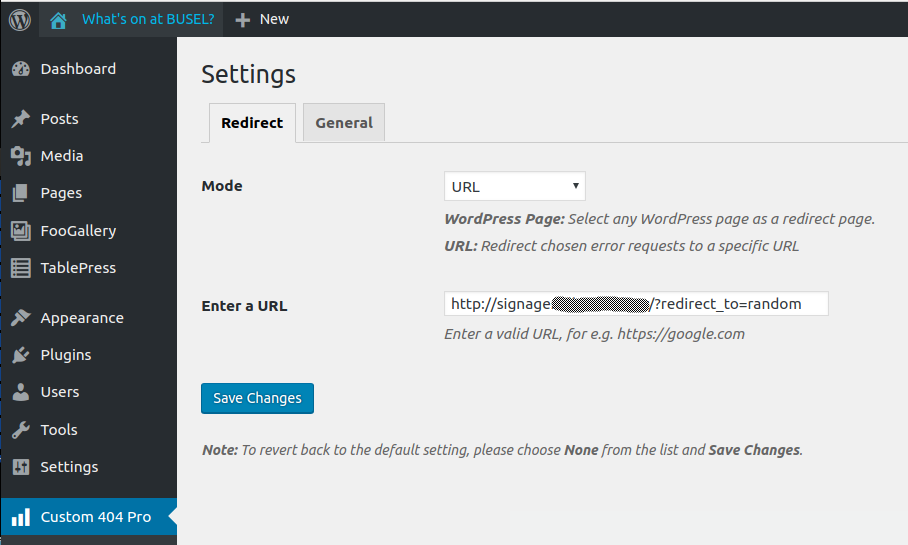
Custom 404 Pro: To avoid any missing post/page messages… If a post is accidentally lost or becomes inaccessible, the signage will be redirected to the main (first) page of the signage
i.e. (http:///signage.yourdomain.com?redirect_to=random).
Disable All WordPress Updates: Auto updates could be a nuisance when notices pop every now and then.
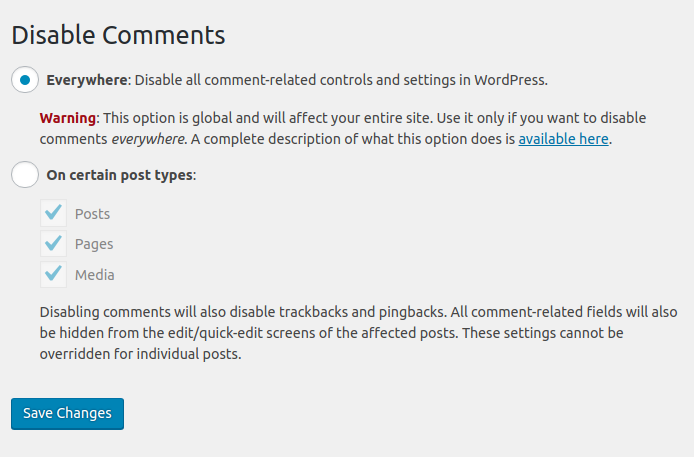
Disable Comments: Stop worrying about spam comments.
Disable Gutenberg: I didn’t like working with the Gutenberg page composer therefore I prefer to disable it. You might want to keep it, though,
Disable XML-RPC: Never used XML-RPC. Causes too many errors when robots try break your site. Disabling XML-RPC enhances security.
Easy Image Collage: Nice plugin to build masonry of pictures.
FooBox Image Lightbox and FooGallery: Very popular gallery management tools.
Head Meta Data: Another pillar plugin for the signage. This plugin injects meta tagged HTML code into every post/page, which redirects the page to another URL, after a certain amount of seconds; namely to
http://signage.yourdomain.com?reditect_to=random
Post Expirator: Using this plugin, one can remove posts from the signage cycle/pool automatically when the post becomes obsolete. For example, a signage post announcing a concert event, can automatically hide itself 15 minutes before the concert.
Post/Page specific custom CSS: This plugin is used to set CSS on a per-post basis. Useful when you want to use a different color or image for background of a certain post.
Spacer: A very useful short code to adjust vertical spacing of page components in pixels. A must have plugin for signages.
SVG Support: Vector images look much better when you scale them up or down in size. WordPress does not support the SVG image format by default. People say SVG format has security issues but I like this plugin anyway.
TablePress and TinyMCE Advanced: These are trivially handy tools for any WP site.
Some Important Plugin Settings
Custom 404 Pro
Disable Comments

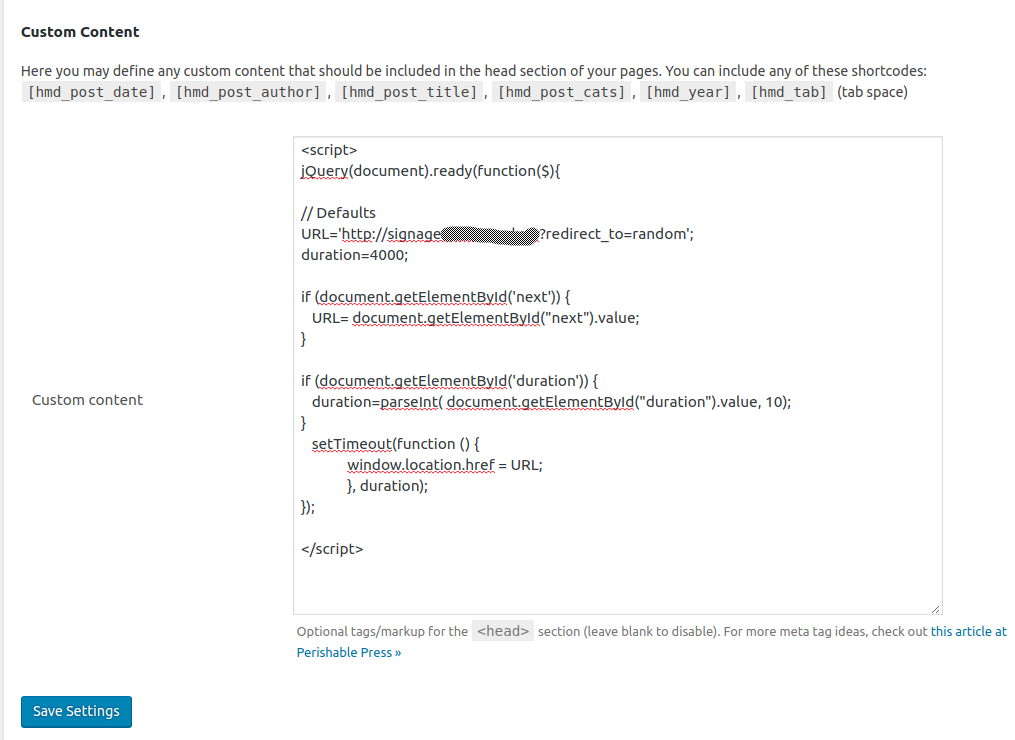
Head Meta Data – Plugin Settings
Here is the copy-pastable script:
<script>
jQuery(document).ready(function($){
URL='http://signage.yourdomain.com?redirect_to=random';
duration=400000;

if (document.getElementById('next')) {
URL=document.getElementById('next').value;
}

if (document.getElementById('duration')) {
duration=parseInt( document.getElementById("duration").value, 10);
}
setTimeout(function () {
window.location.href = URL;
}, duration);
});

</script>
With the above custom content, the plugin will insert the given Javascript code into every post/page. The Javascript code has two important variables; the default duration for which a post will be displayed; namely the “duration” variable; and the default redirection URL.
<input type=hidden name=duration id=duration value=20000>
and/or
<input type=hidden name=next id=next value=”URL_of_the_next_slide”>
In order to add these hidden fields to the post, switch to “Text” mode in the post editor and type anywhere in the text the HTML code for the hidden field.
Sometimes you might have a video playing in a post; or a post with long text which might need longer than 4-10 seconds for the audience to read. In such cases, you would want to extend the time a post stays on the screen; such as the length of the video. You can set the time a post stays on the screen using the “duration” hidden field within that post. For example, if your video is 60 seconds long, you can place a hidden “duration” input field with a value of 60000.
Please note that the duration is in milliseconds. If such a field exists, the script will wait “duration” milliseconds and then refresh the page, redirecting it to “http://signage.yourdomain.com?redirect_to=random”. If there is no “duration” field within the page, the script will wait the default 10000 miliseconds (10 seconds) and then redirect to the same URL, which will bring up a random post.
Sometimes you would want a “next” post to be displayed rather than a random post after certain posts. If the “next” hidden field exists, the value is expected to be the URL of the next slide to be shown on the signage. I do not recommend long chains, though. If there’s a next slide on a post, the next one to be seen will certainly be that one. However, since the plugin picks posts randomly, there is chance that your chain will start with a slide which is not the first one. Make sure the last slide of the chain contains a “next” field value of
“http://signage.yourdomain.com?redirect_to=random”
so that the signage keeps on playing.
More Settings
The theme I used in my WP site is “Uni Education” which is one of the free WP themes that one can find in WP Theme repository. If you chose a different theme, make sure it allows Custom CSS through theme customization.
My theme Custom CSS is:
#top-menu{display:none}

.site-title a,p, html, body {font-family:Trebuchet, Verdana, Arial, Sans !important; }

.menu-toggle, .menu-open , .site-info {display:none}

html, body, p, td, tbody {color:#eeeeee !important; border:none}
table {border-style:none !important}
.site-title, html, body, p,tbody, td{
text-shadow:
-0px 0px 1px hsl(20, 100%, 0%),
-2px 2px 0px hsl(20, 100%, 0%),
-2px 2px 0px hsl(20, 100%, 0%),
-2px 2px 0px hsl(20, 100%, 0%),
-2px 2px 0px hsl(20, 100%, 0%),
-2px 2px 0px hsl(20, 100%, 0%);
}
html {overflow-y: hidden}
.inner-header-image {display:none}
.navigation, .post-navigation, .entry-meta {display:none}
Note that clases and IDs mentioned in my custom are theme dependent. Then set attributes to classes and IDs pertinent to my theme.
CSS Text shadowing looks good. If you want to change the default text color, background color on a per post basis, you can use the Custom CSS field which you will see while editing a post.
An example for a per-post custom CSS looks like:
body, html, table, p, td, tbody {background-color:#333 !important; text-shadow:none !important}
.tablepress-id-1 .column-4{text-align:right}
.tablepress-id-1 .column-5{text-align:right}
In the example above, custom CSS was used to right justify two columns in the table created using the TablePress plugin.
Please note that you probably will have to use the “!important” tag for every class or id attribute that you specify.
Things to Do on Raspberry Pi
When the RPi boots, it should boot into a desktop manager, logon automatically and start the chromium browser in kiosk mode.
The default user account in Raspbian is usually “pi”. You can use the utility raspi-config to make sure the RPi boots into the desk manager and automatically logs on as the default user “pi”.
Boot Options –> Desktop / CLI –> Desktop Autologin
(If you have problems with setting the auto login user, you can edit /etc/lightdm/lightdm.conf to set autologin-user=pi.)
Next, set the resolution which is closest to the resolution of the display (probably a TV) that you will use.
raspi-config –> Advanced Options –> Resolution
Furthermore, you wouldn’t want the screensaver or power saving to kick in. Easiest way to disable these is editing /etc/lightdm/lightdm.conf manually. Change the line which reads “xserver-command=X” to “xserver-command=X -s 0 -dpms” in the [SeatDefaults] or [Seat:*] section of the configuration file.
Make sure that the user “pi” starts the chromium-browser automatically upon login. For best signage appearance, browser should be started in kiosk mode and directed to the URL of your WordPress site.
In order to start chromium when pi’s desktop is up; create the file /home/pi/.config/autostart/chromium-autostart.desktop and put the following text in it:
[Desktop Entry]
Type=Application
Exec=/usr/bin/chromium-browser --incognito --noerrdialogs --disable-session-crashed-bubble --disable-infobars --kiosk http://signage.bilkent.edu.tr
Hidden=false
X-GNOME-Autostart-enabled=true
Name[en_US]=AutoChromium
Name=AutoChromium
Comment=Start Chromium when desktop starts
Restart the RPi for these to take effect.
You might want to tweak the Raspbian a little further: setting up iptables firewall so that only authorized IP addresses can reach this machine. You wouldn’t want a defaced signage; would you?
Disabling Raspbian ( Raspbian 9.8 doesn’t check for updates by default) auto updates is also a good idea.
You might also want to turn off apache web server’s access and error logging.


